Serving Roselle & nearby Bloomingdale, Hanover Park

Kitchen Island & Peninsula Installation in Roselle, IL

We add, enlarge or replace kitchen islands and peninsulas in Roselle, with seating, power and plumbing planned around real clearances.

  • Kitchen remodels across Roselle ZIP 60172
  • One project manager from drawings to final walk-through
  • Permits and inspections handled for you

Prefer a callback?

Leave your number and a Roselle island installer will call you.

Island and peninsula problems we solve in Roselle

An island only helps if you can still walk around it. Before we build one in your Roselle kitchen, we check aisle widths, door swings and where power and water can reach, then install a base anchored to the floor with a top, seating and outlets that work.

Dated peninsula with a half wall

Many 1970s kitchens have a peninsula topped with a knee wall or hanging cabinets. Removing them opens the view and leaves a clean seating counter.

No outlets at the island

Outlets are part of almost every island we build, both because code usually requires one and because people use them daily.

Clutter with no storage

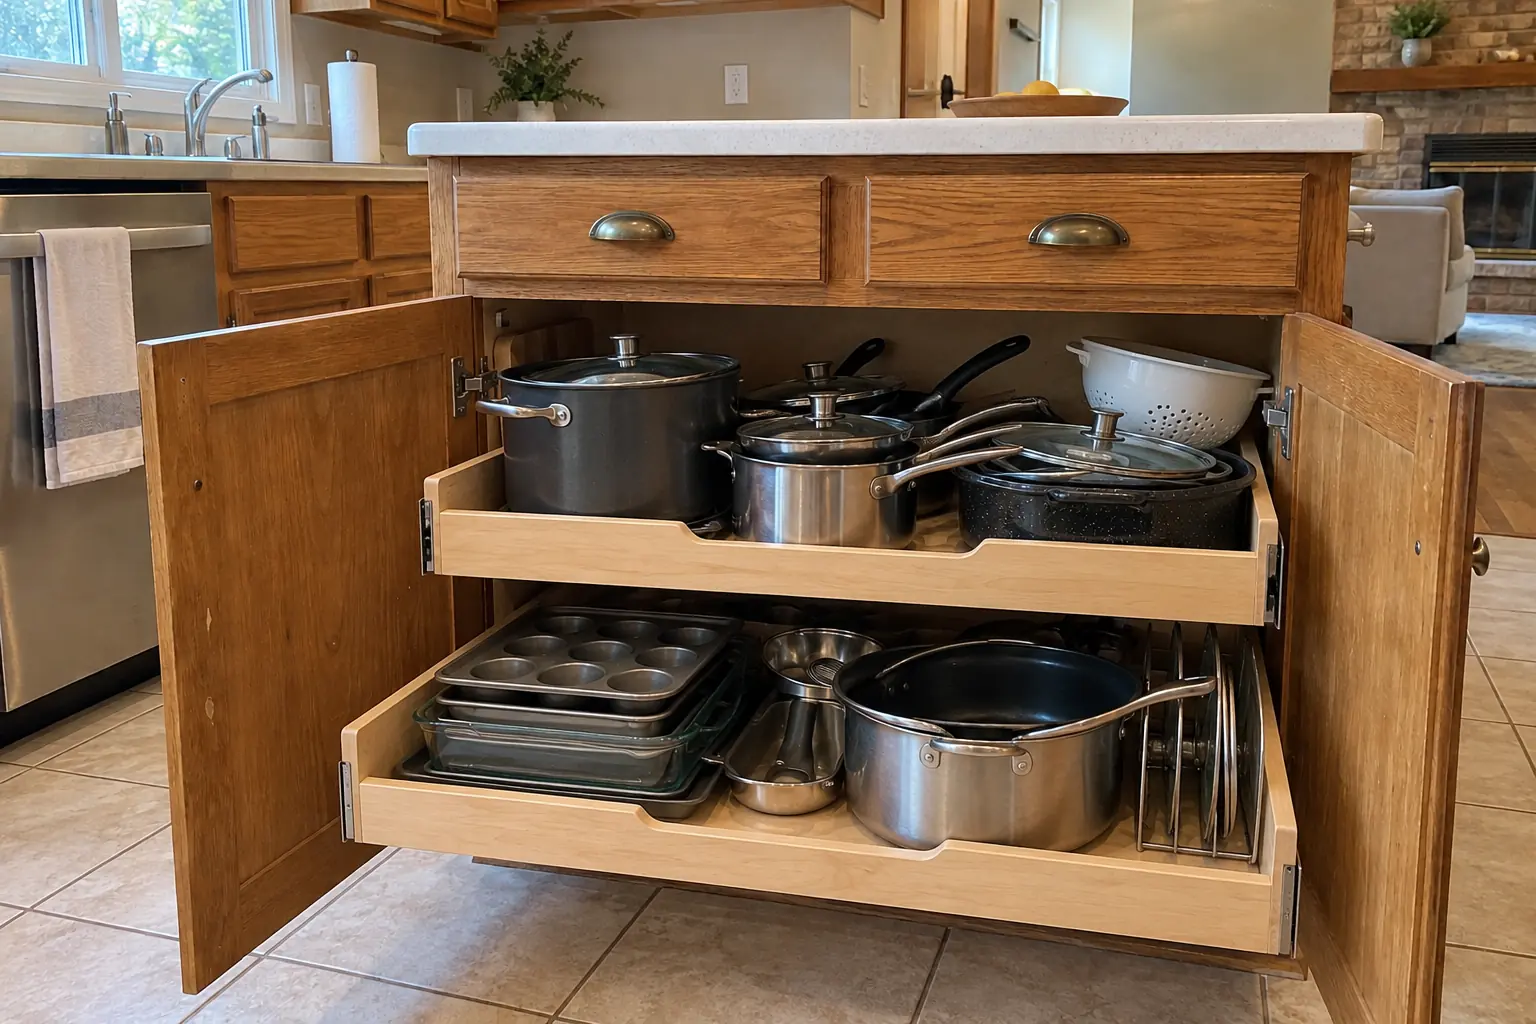
Counters full of things that have nowhere to go? Island drawers and pull-outs give them a home.

Want the cooktop in the island

If you want to cook facing the room, we plan the island around the cooktop, the ventilation path and safe space on both sides.

Want a sink in the island

Moving the sink to the island lets you face the room while you work. It needs a drain path and a vent that meets the plumbing code, usually a loop vent run inside the island.

Island that wobbles or shifts

A freestanding island that slides when you lean on it isn't safe for stone. We fasten the base to the floor with cleats so it stays put.

No place to sit in the kitchen

A counter with seating turns the kitchen into the spot where people gather. We size the overhang and the stool spacing so it's comfortable.

Small kitchen with no room for an island

A peninsula needs clearance on fewer sides than an island. In tighter kitchens it's often the better choice.
What's included

  • Layout and clearance checkTaped outlines on the floor so you can walk around the island before anything is ordered.
  • Floor prepWe repair the floor under the footprint and install cleats or blocking to fasten the base.
  • Electrical rough-inPower routed through the floor or from an adjacent wall, with boxes placed for outlets and lights.
  • Island cabinets set and anchoredWe set the island boxes level, join them and fasten them down.
  • Panels and seating sideFinished end and back panels, with knee space and furniture details where you want them.
  • Overhang supportHidden or visible supports sized to the overhang and the countertop material.
  • CountertopTop templated on the installed base and set with sink and cooktop cut-outs.

Choices you'll make

Counter or bar height seatingCounter height keeps one continuous surface; a raised bar hides prep clutter from the room.
Waterfall endsThe countertop continues down the sides of the island to the floor for a clean modern look.
Island cabinetsIsland cabinets can match the perimeter or stand out in another color or wood.
Legs, corbels and bracketsHidden steel brackets for a clean edge, or decorative corbels for a traditional style.
Pop-up and side outletsWe place outlets where code allows and where they won't be in a spill zone.

Before and after: kitchens near Roselle

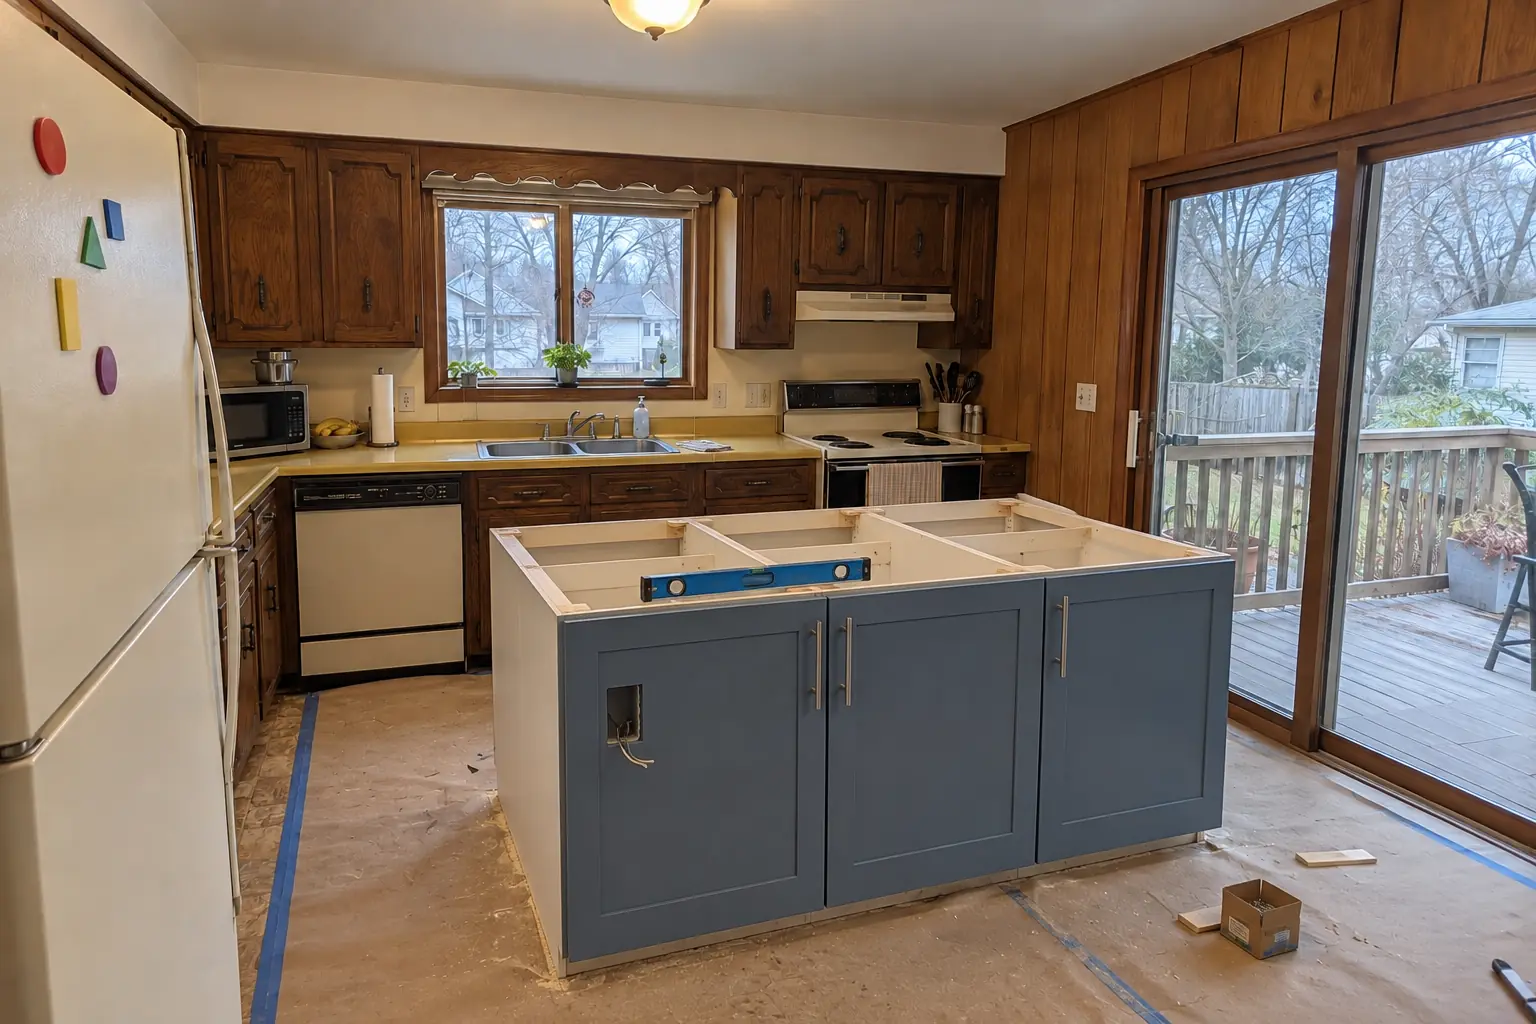
Kitchen Island & Peninsula Installation in a 1970s split-level / raised ranch / tract — beforeBefore
Kitchen Island & Peninsula Installation in a 1970s split-level / raised ranch / tract — in progressIn progress
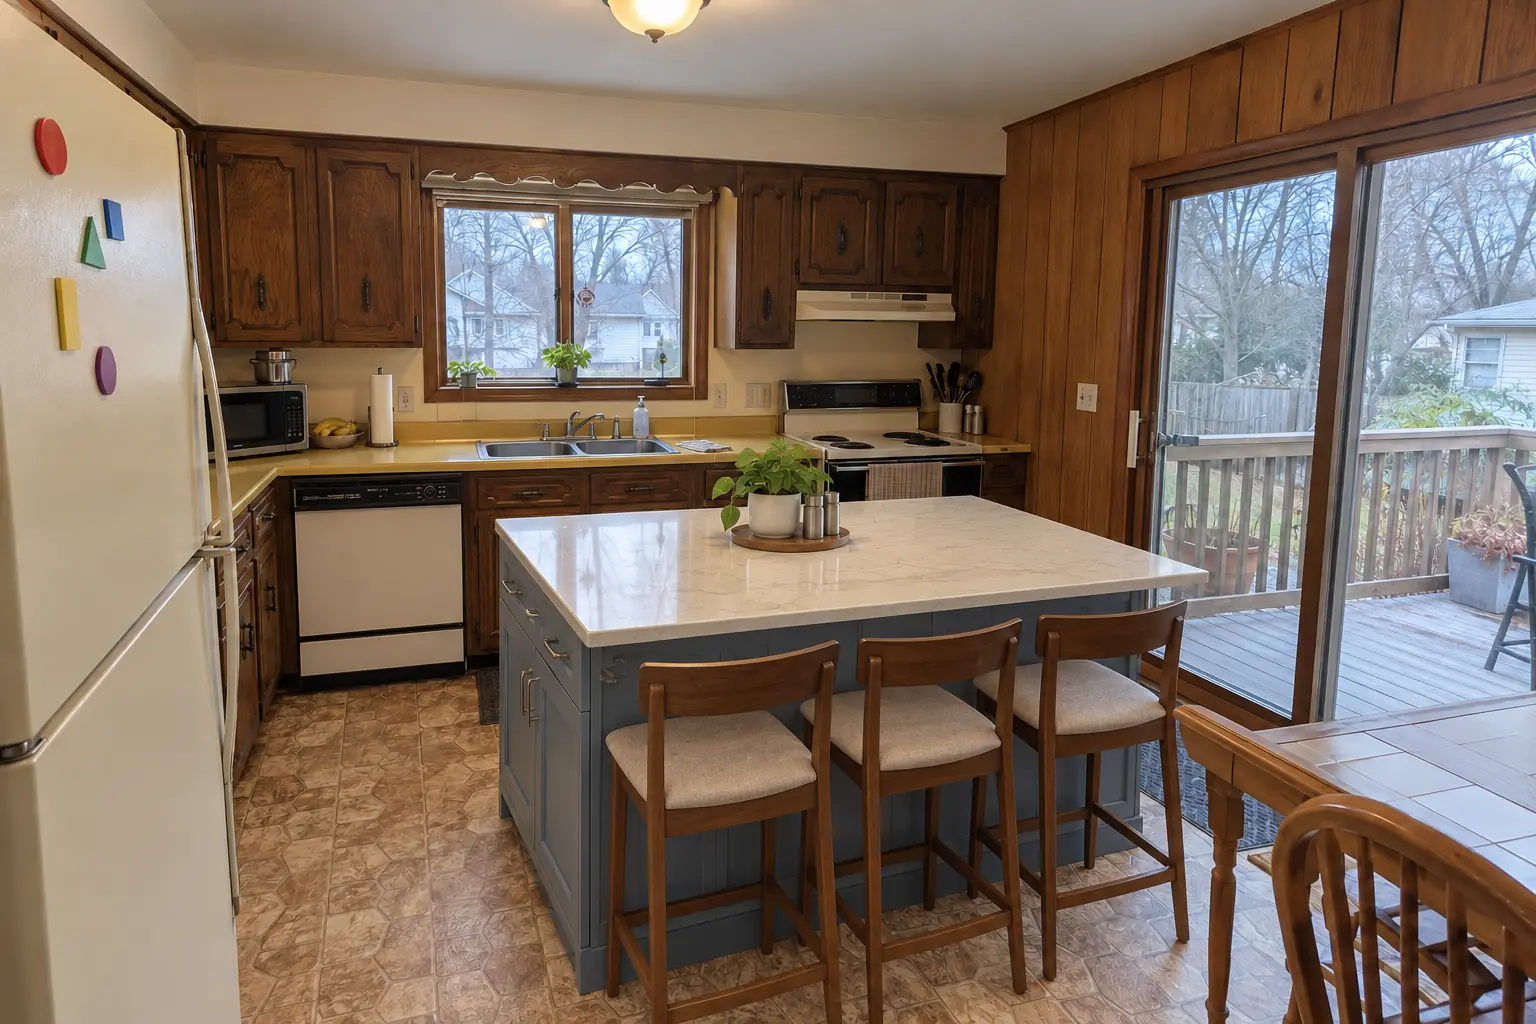
Kitchen Island & Peninsula Installation in a 1970s split-level / raised ranch / tract — afterAfter

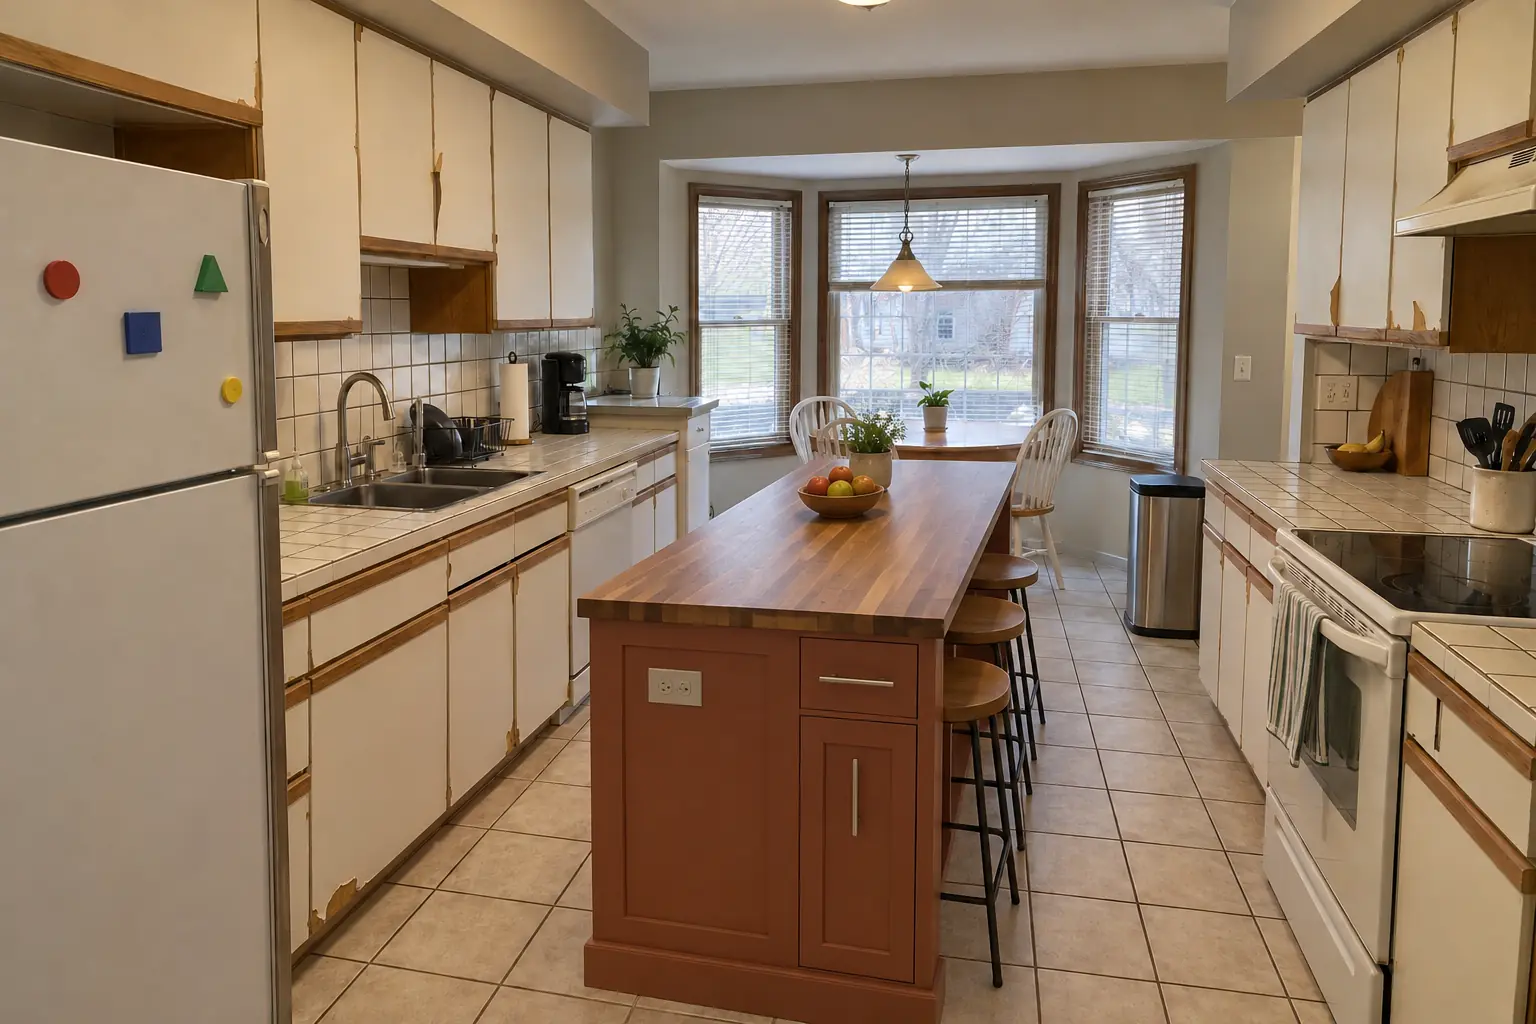
Kitchen Island & Peninsula Installation in a 1970s tract home, Roselle

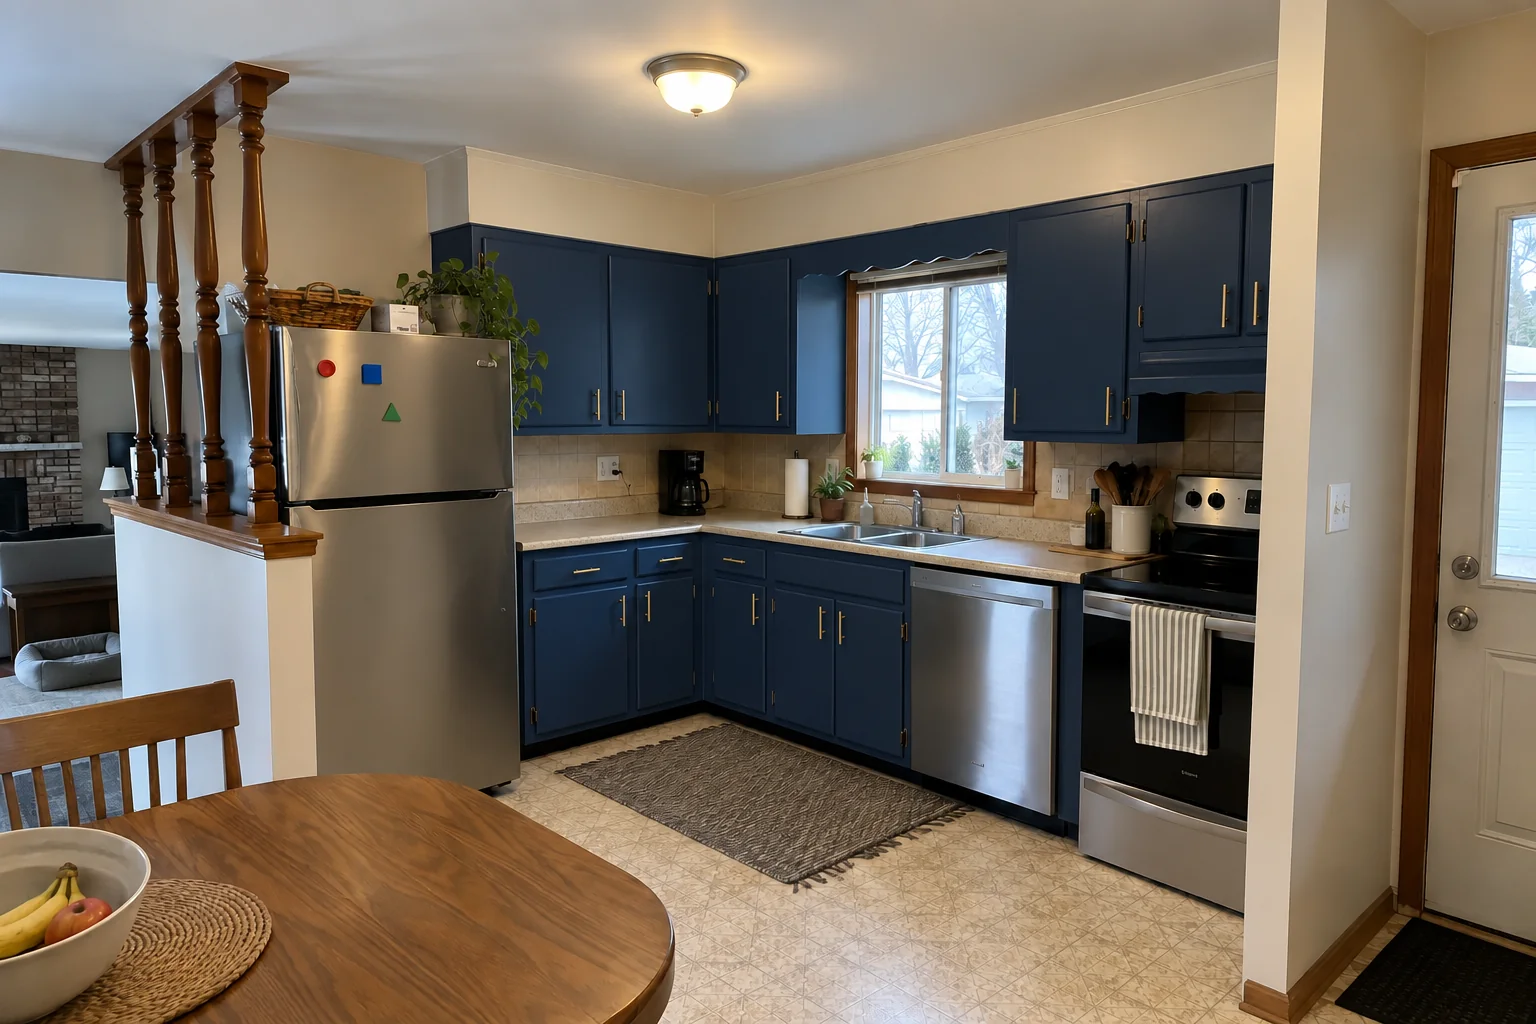
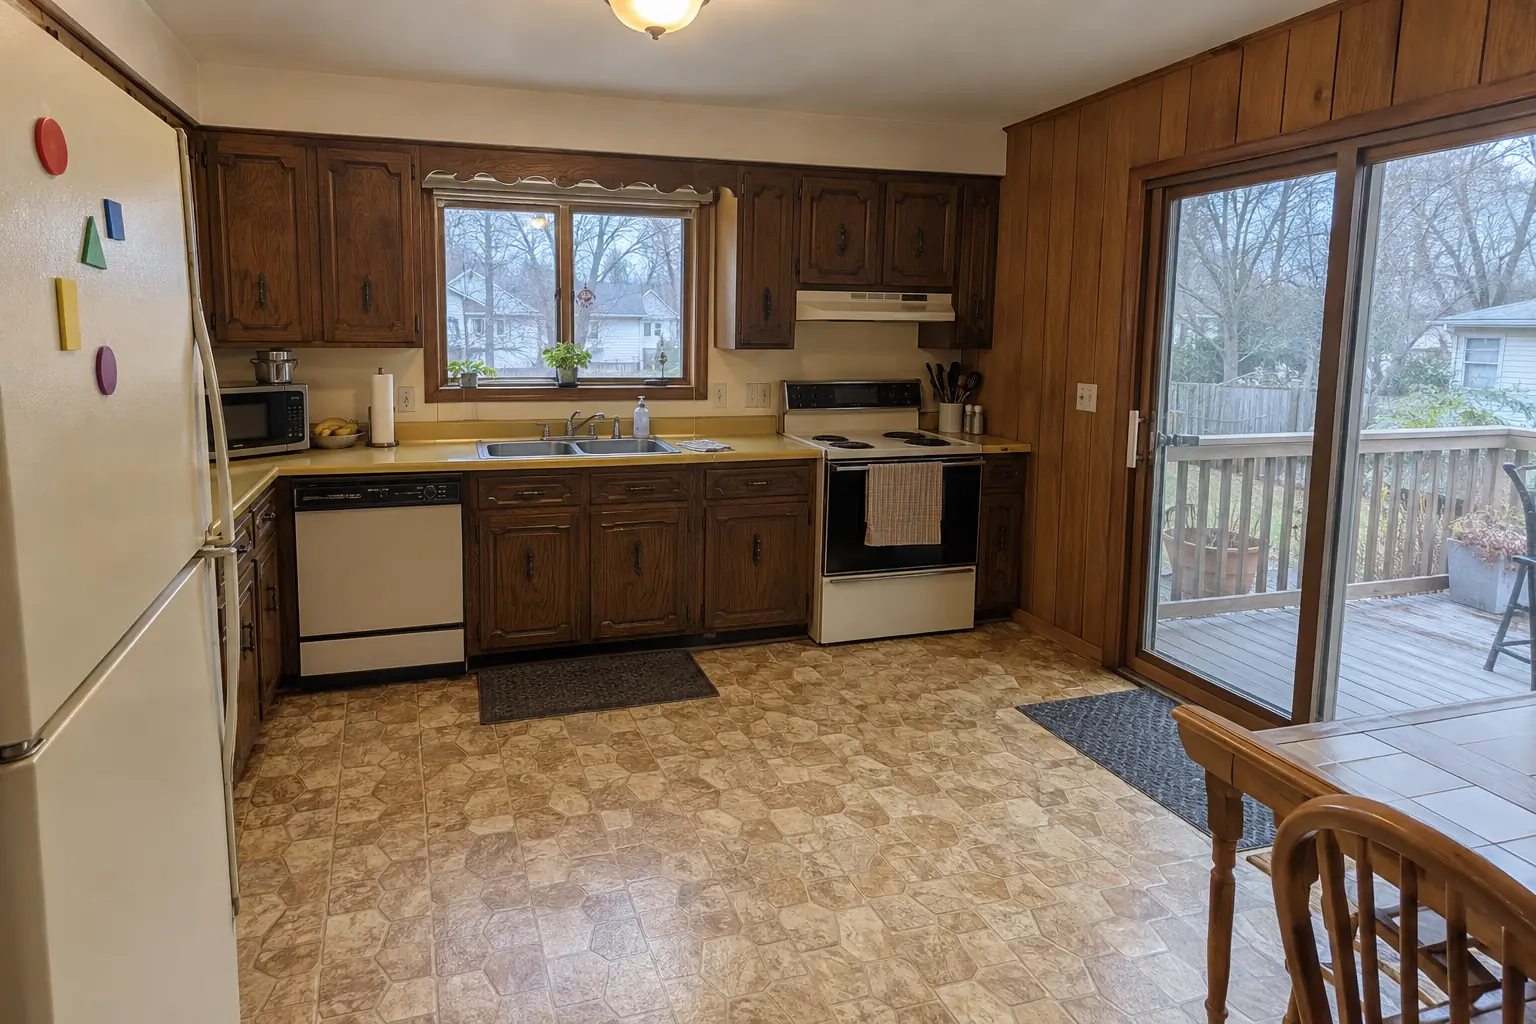
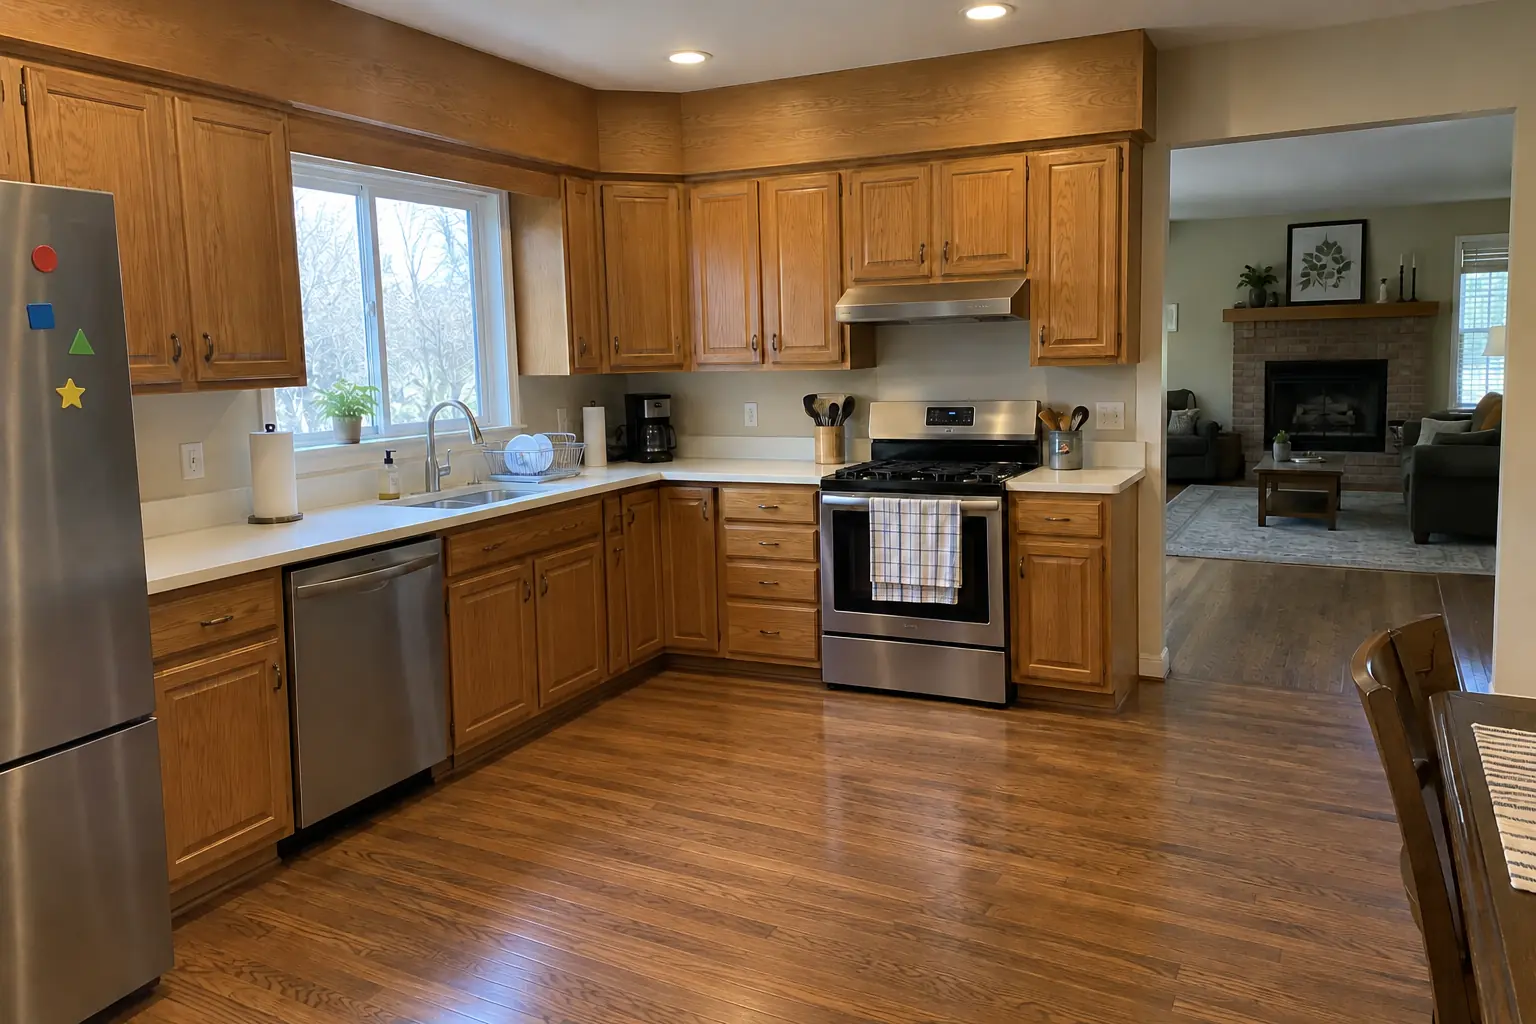
This one is a 1970s tract home in Roselle. What we started with: dark stained oak cabinets with wide face frames and a scalloped wood valance over the sink and harvest-gold laminate. What bothered the owners most: too little counter space and nowhere to sit. After: a new island in dusty blue with a creamy quartzite-look quartz top and seating. On site this meant layout and clearance check, island cabinets set and anchored, plus countertop.
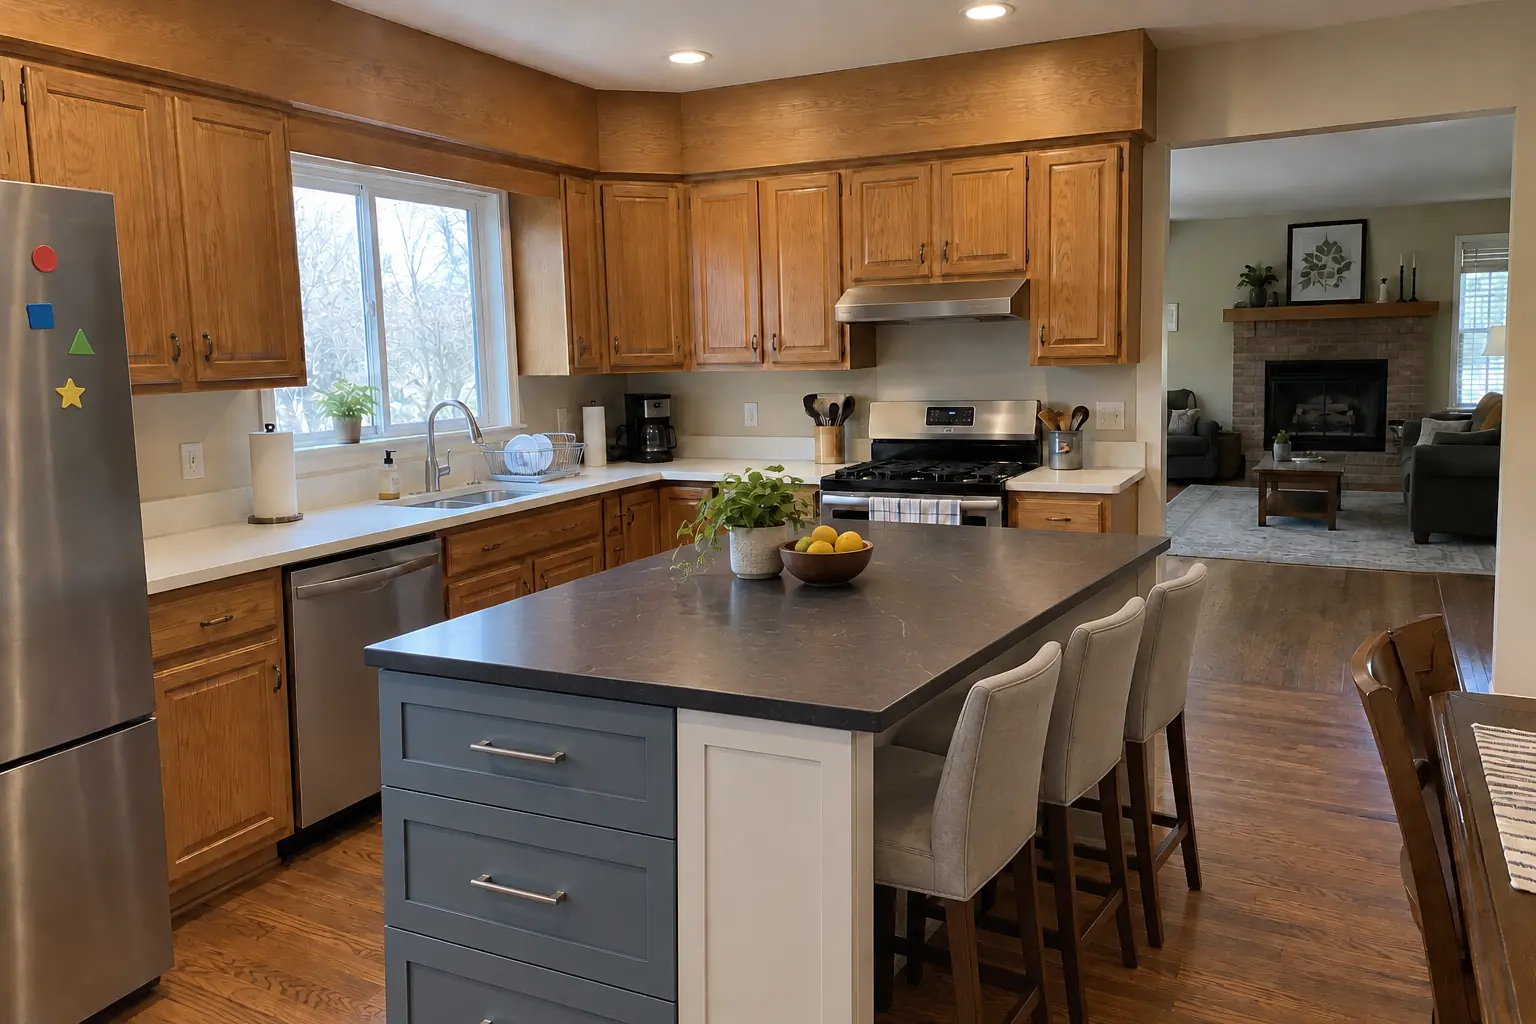
Kitchen Island & Peninsula Installation project in Bloomingdale, beforeBefore
Kitchen Island & Peninsula Installation project in Bloomingdale, afterAfter

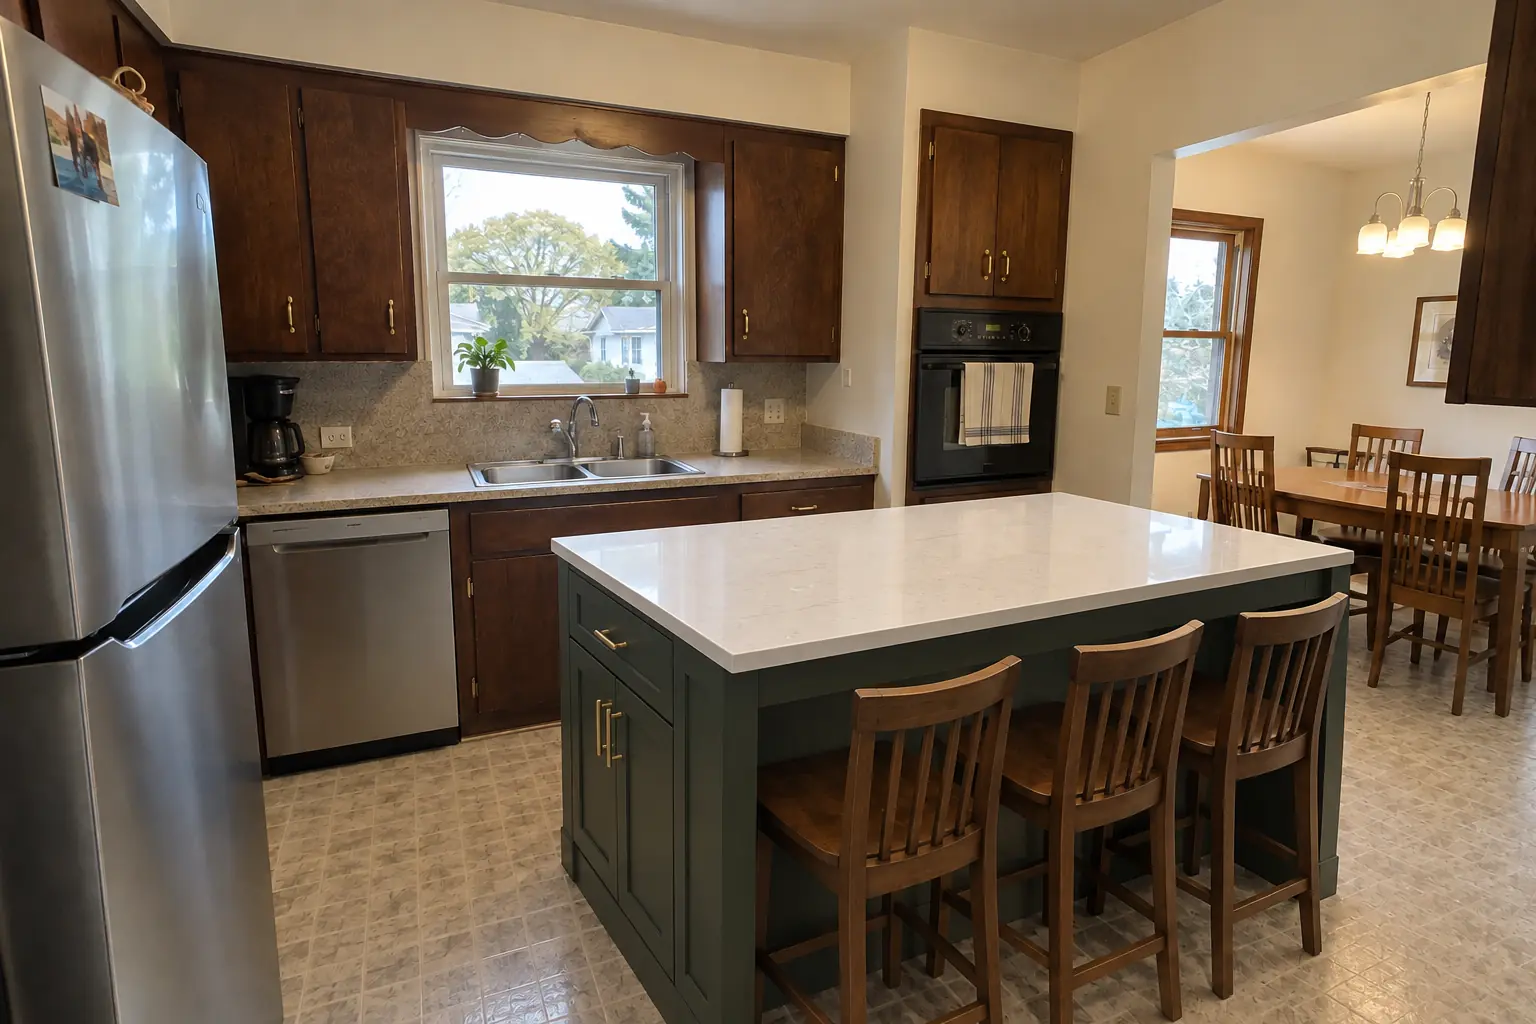
A Bloomingdale 1990s two-story colonial: before and after

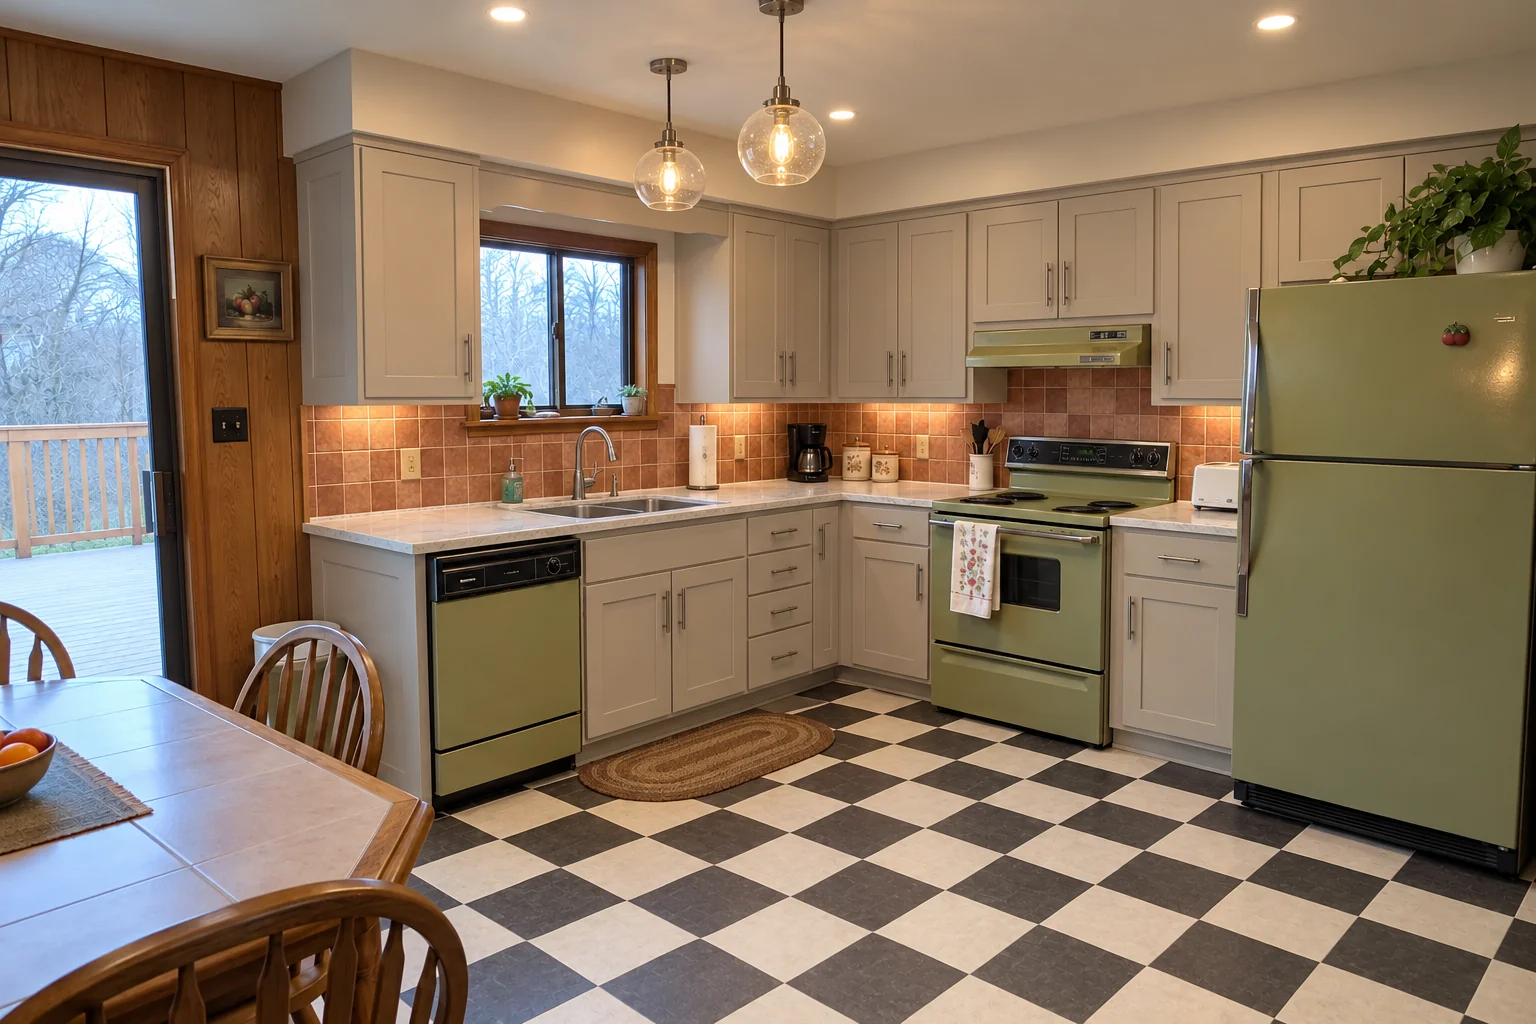
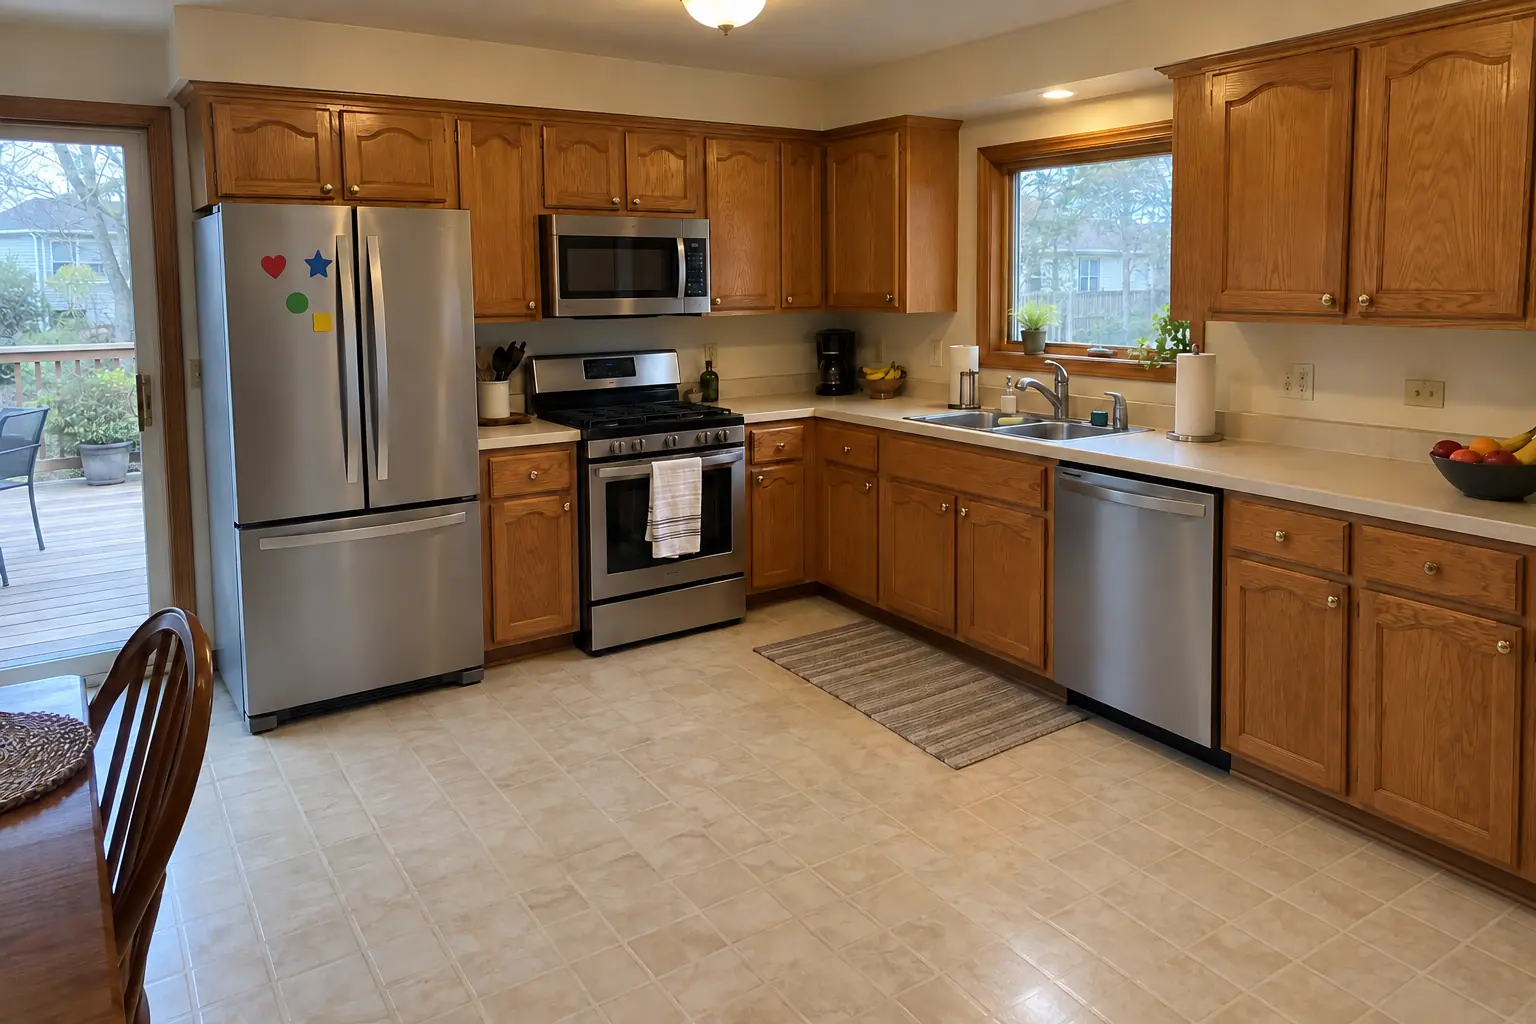
A 1990s two-story colonial near Old Town Bloomingdale, a typical kitchen for Bloomingdale. What we started with: golden-oak cabinets with oak soffits above and white Corian-style solid surface with a yellowed seam. The reason for the call: no central counter for prep and seating. Finished kitchen: a new island in dusty blue with a dark soapstone-look quartz top and seating. Work included layout and clearance check, floor prep, plus overhang support.

Kitchen Island & Peninsula Installation in Bloomingdale →
Kitchen Island & Peninsula Installation project in Itasca, beforeBefore
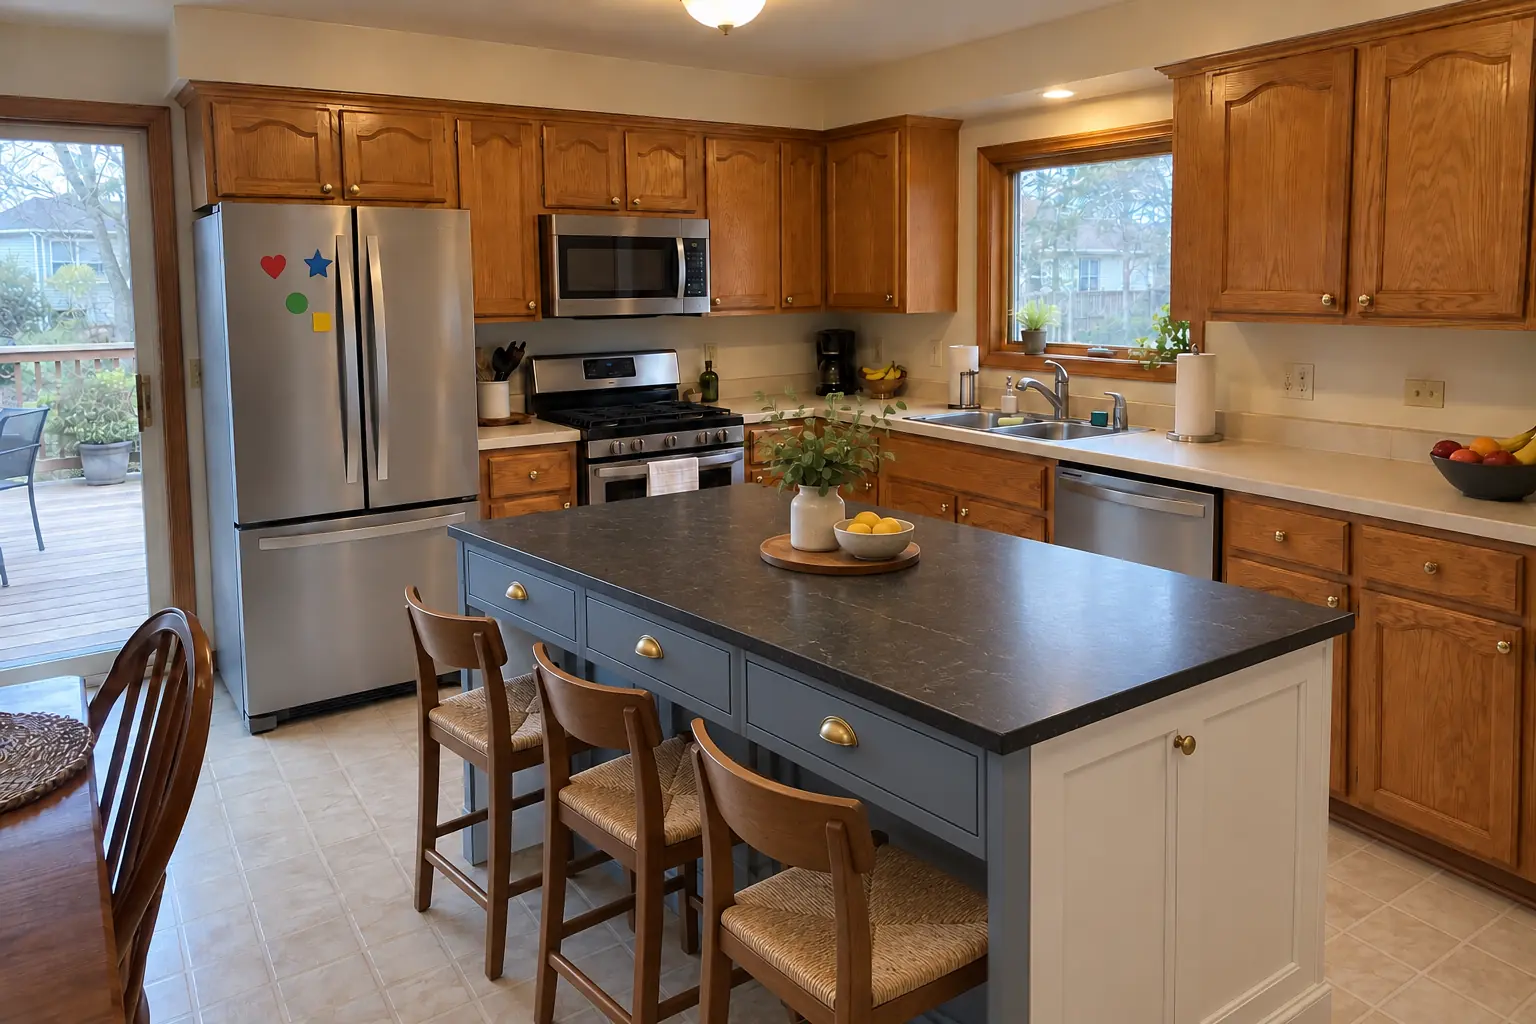
Kitchen Island & Peninsula Installation project in Itasca, afterAfter

Itasca kitchen, 1980s two-story: kitchen island & peninsula installation

The site: a 1980s two-story near Nordic Park. What we started with: honey-oak cathedral raised-panel cabinets with worn finish near the handles, brass knobs and almond laminate with a backsplash lip. What bothered the owners most: too little counter space and nowhere to sit. After: a new island in dusty blue with a black honed granite top and seating. On site this meant floor prep, panels and seating side, plus overhang support.

Kitchen Island & Peninsula Installation in Itasca →
Pantry Design & Installation project near Roselle, beforeBefore
Pantry Design & Installation project near Roselle, afterAfter

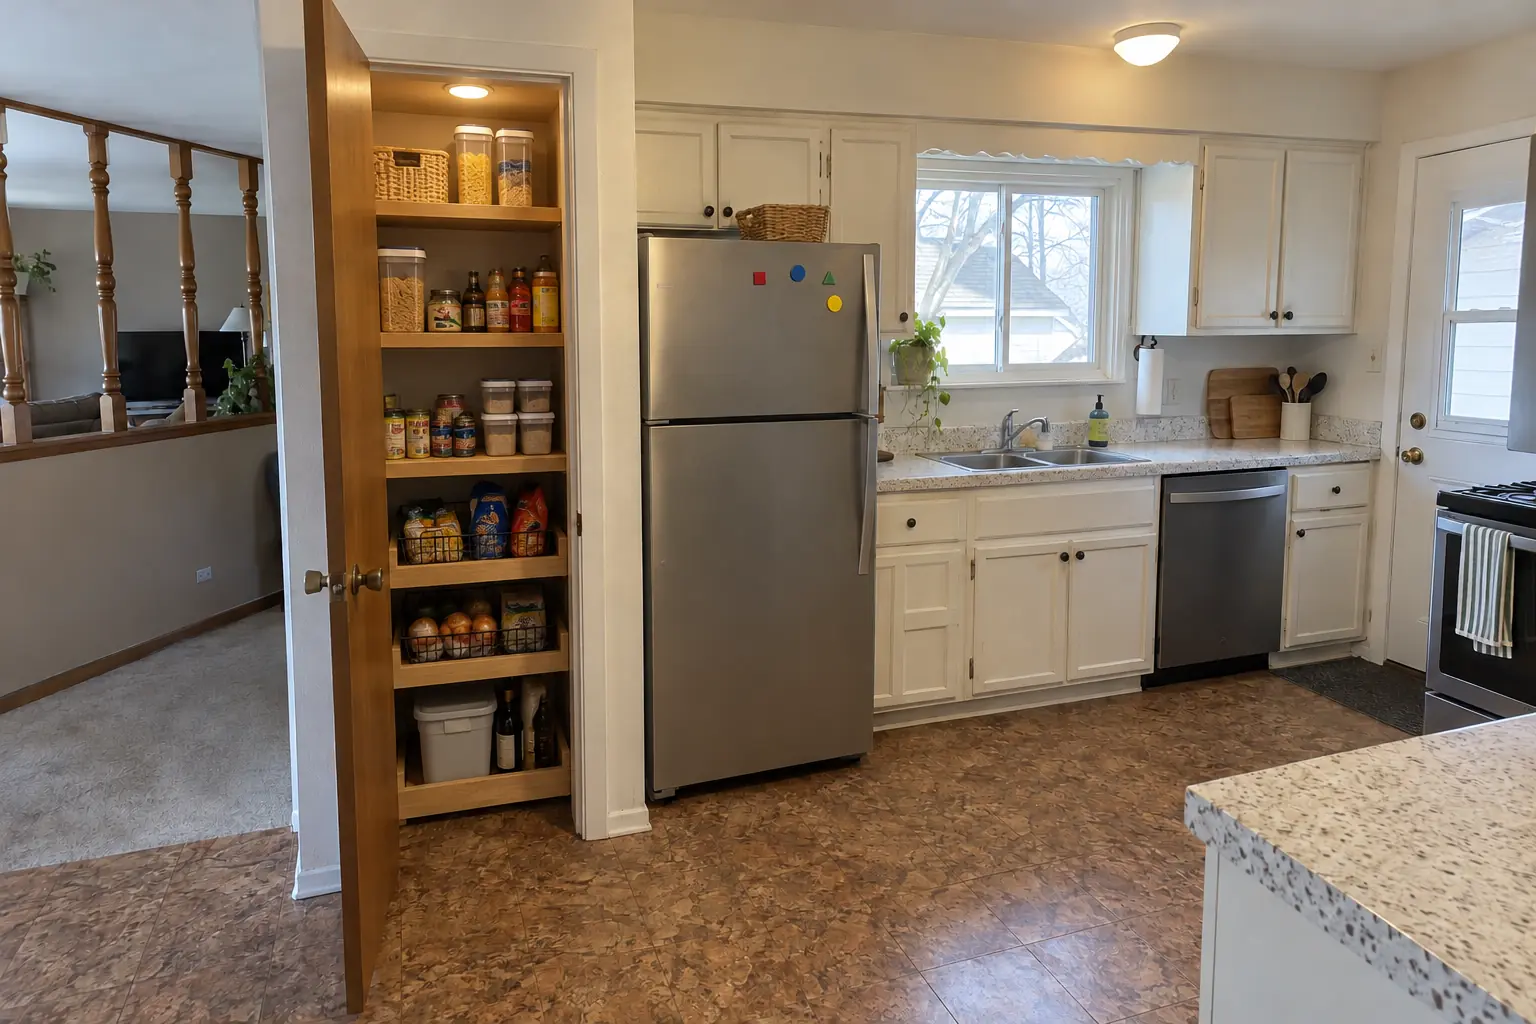
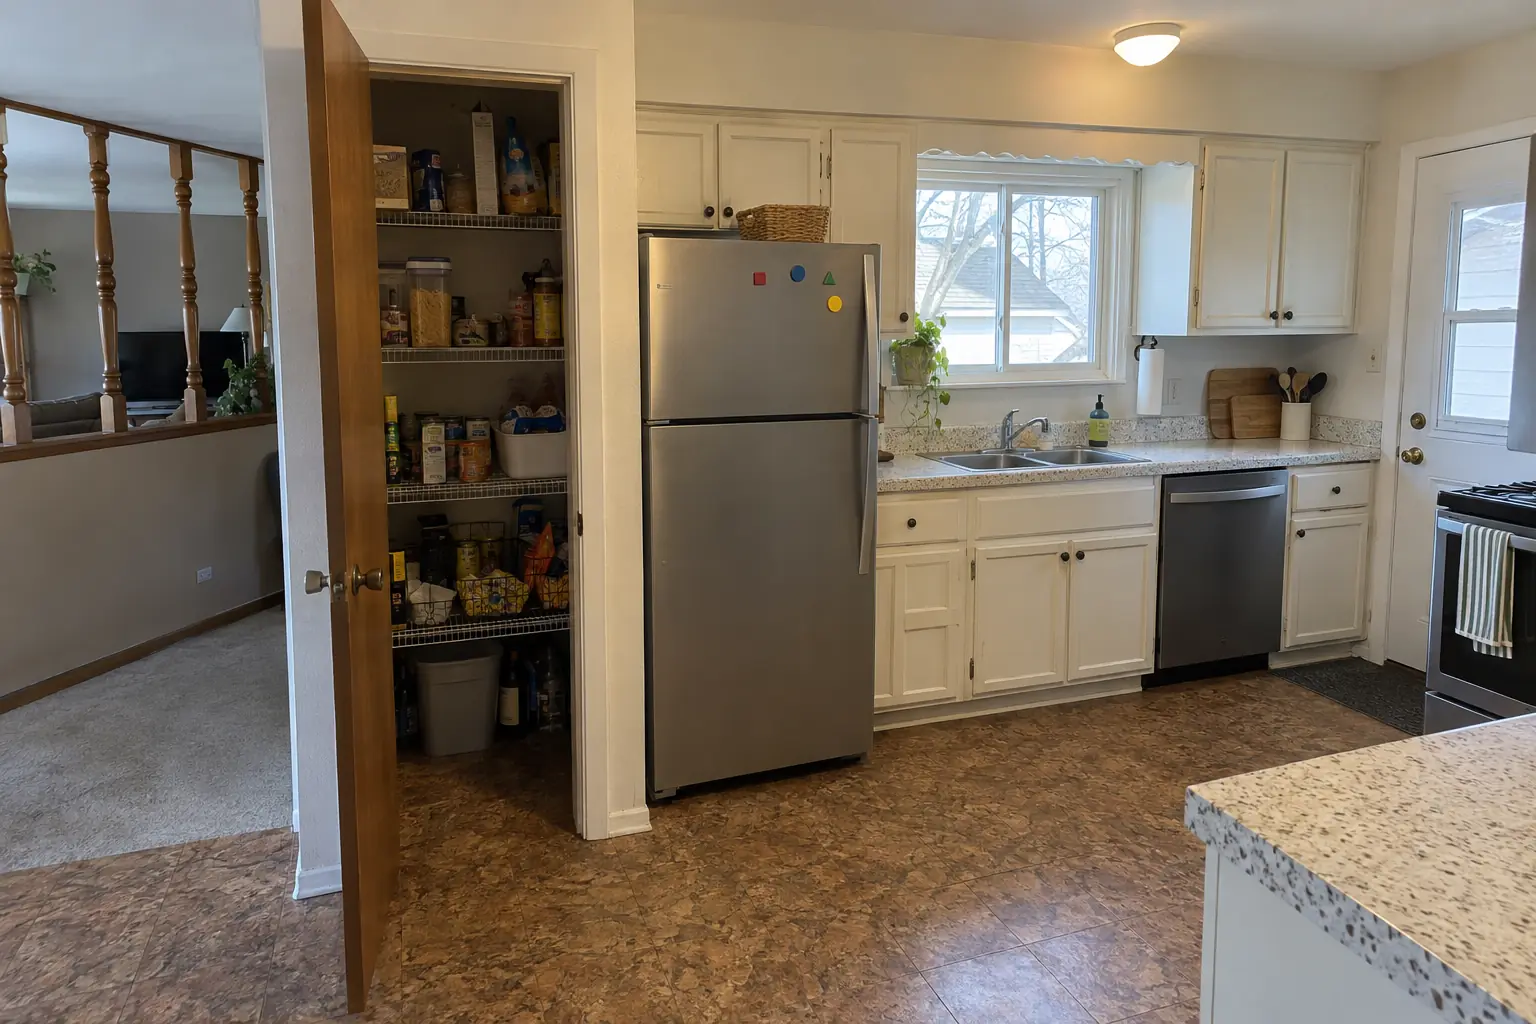
Roselle kitchen, raised ranch: pantry design & installation

What changed: the closet next to the kitchen rebuilt as a pantry with solid wood shelves, pull-out baskets on the bottom and a light.

Pantry Design & Installation in Roselle →
Built-In Breakfast Nook & Banquette project near Roselle, beforeBefore
Built-In Breakfast Nook & Banquette project near Roselle, afterAfter

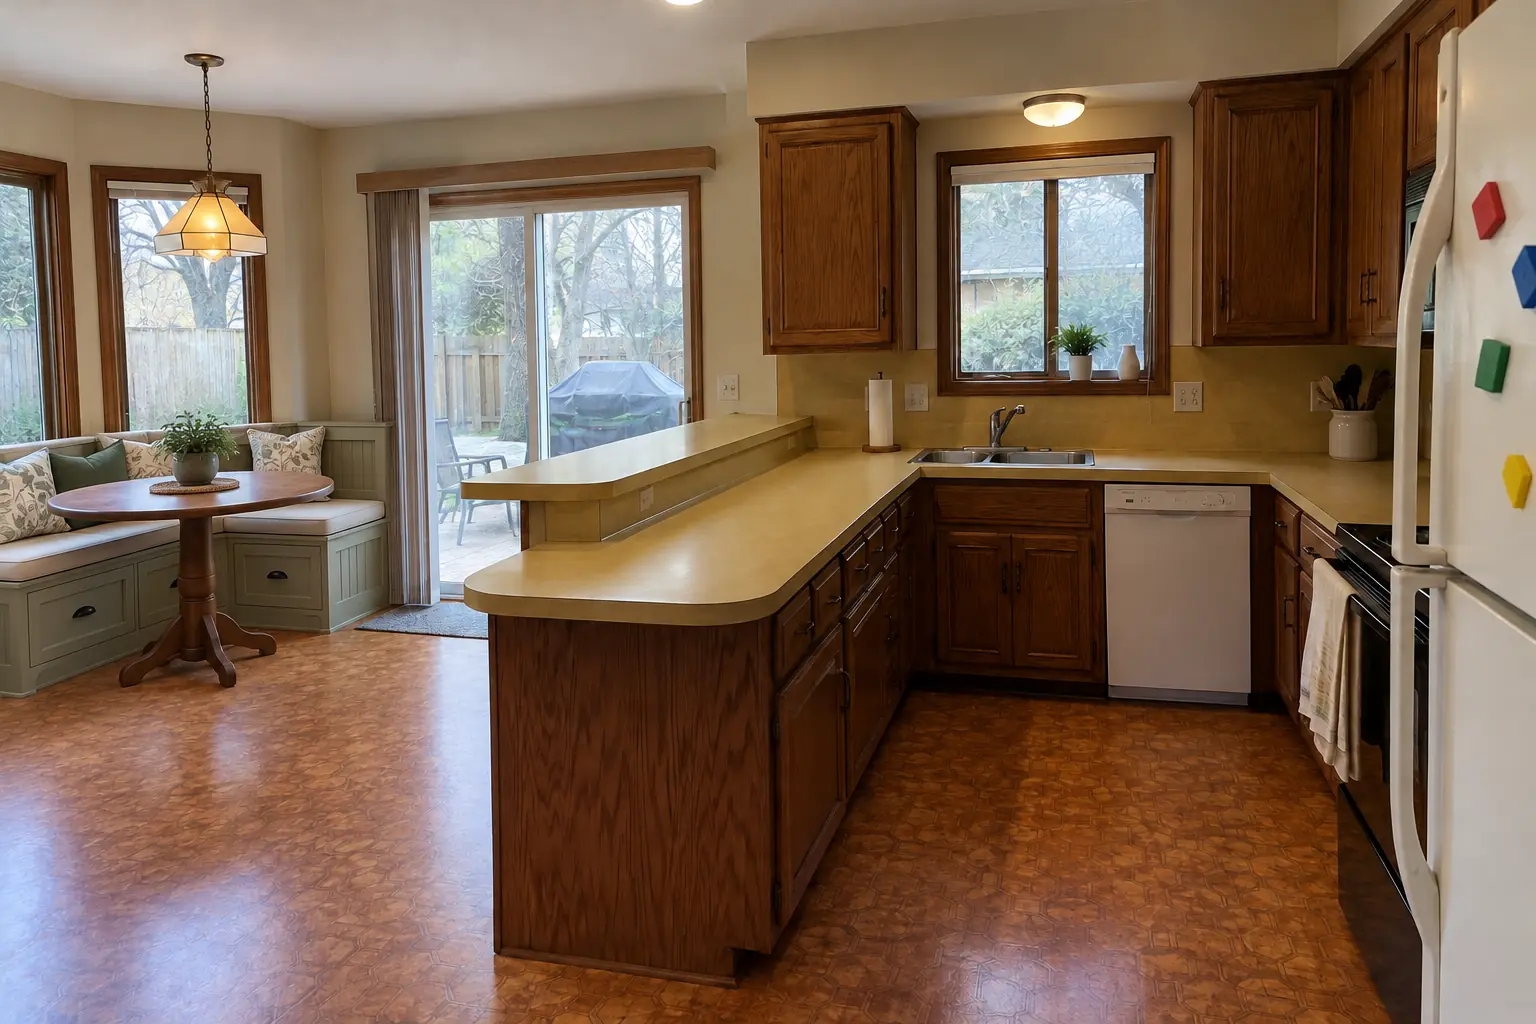
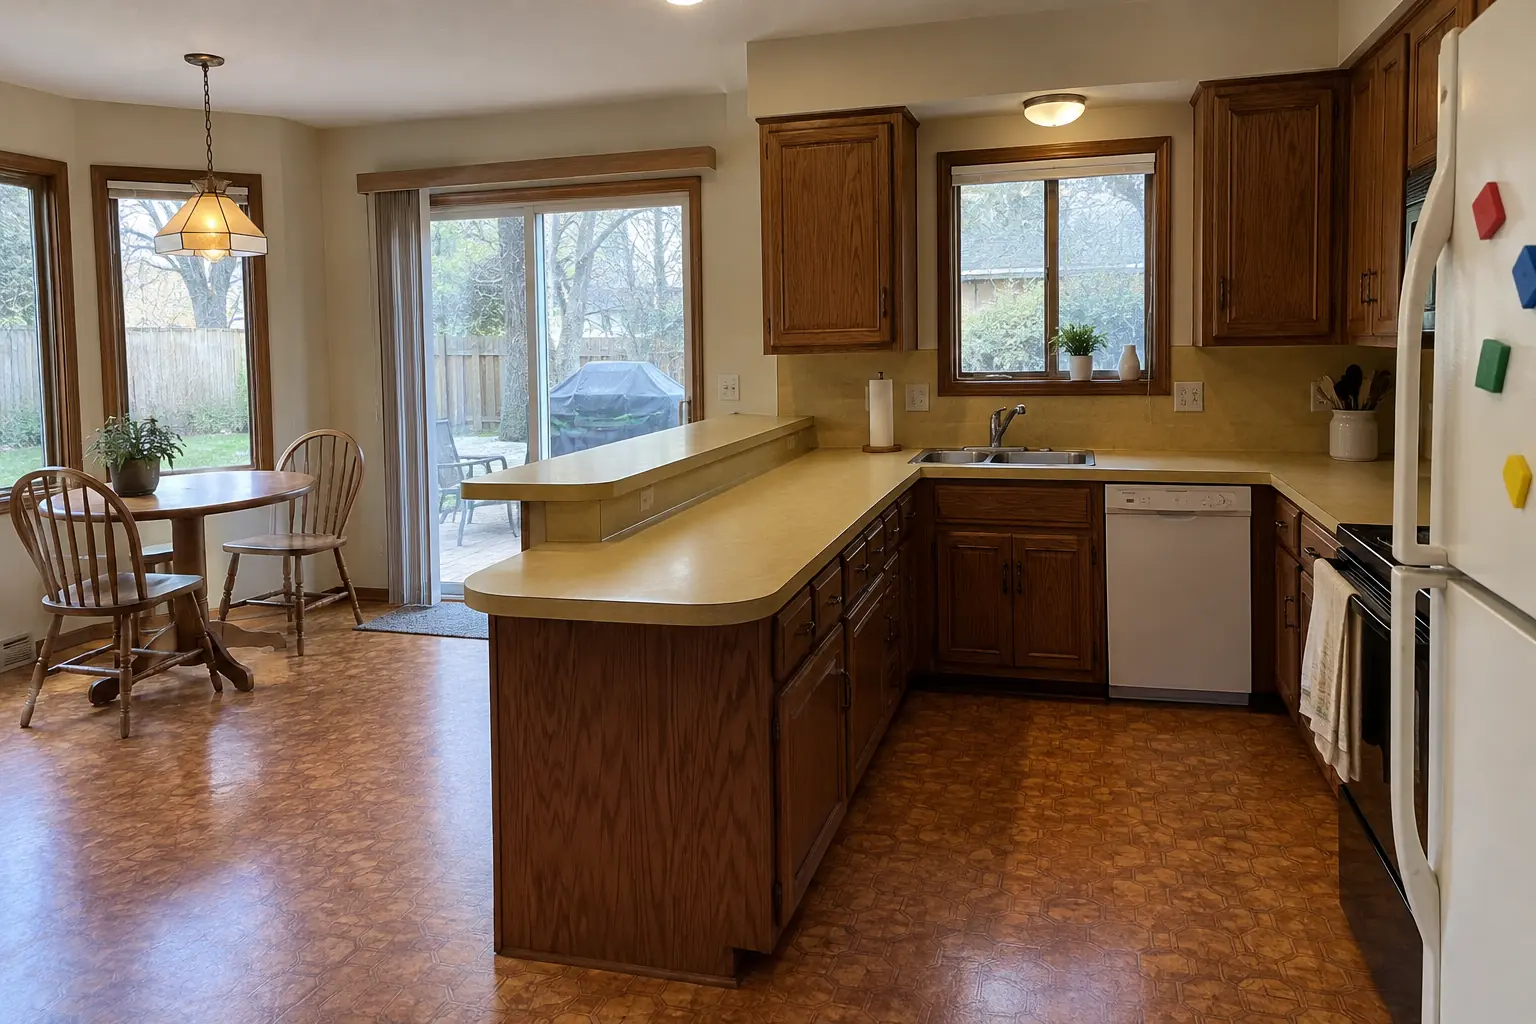
Roselle kitchen, 1970s tract home: built-in breakfast nook & banquette

What changed: a built-in banquette bench with storage drawers and cushions under the window, with a round pedestal table.

Built-In Breakfast Nook & Banquette in Roselle →

From first visit to final walk-through

  1. Measure and mock-upWe measure the kitchen and tape the island outline on the floor so you can test the walkways.
  2. Plan and written estimateA layout with dimensions and a written estimate covering carpentry, electrical and plumbing.
  3. Rough-in and permitsWe pull any needed permit and run the lines, then the inspector checks them.
  4. Build and countertopCabinets fastened down, sides finished, then the countertop is measured and set.
  5. Hookups and walk-throughFinal connections, cleanup and a look at the finished island together.

Kitchen Island & Peninsula Installation questions from Roselle homeowners

Does a kitchen island need an electrical outlet?
Most building codes require one, and it's practical regardless. We place it where it's safe and easy to reach.
Can the island match my existing cabinets?
Matching works when the line is still made; otherwise a contrasting island color is a safe, attractive choice.
How much space do I need for a kitchen island?
Plan on about 42 inches of walkway around the island, or 48 inches if two people cook often. Subtract those aisles from the room to see how large the island can be.
How much overhang do I need for seating?
Roughly 12 to 15 inches at counter height is common, with about 24 inches of width per stool. Stone overhangs that deep usually need brackets.
How long does island installation take?
Once cabinets are on site, setting and anchoring the base usually takes a day or two; rough-ins, inspection and the countertop add time around it.
Roselle building permit for island project: where do I apply?
Permits go through Development & Engineering Services (Building & Zoning), phone 630-671-2821. When your scope needs one, we prepare the application and schedule the inspections.
Roselle contractor registration: do kitchen contractors need it?
Contractors must register with the Village via Cloudpermit and be licensed: surety bond, certificate of insurance naming the Village, $75 fee. We take care of that before work starts.
Does Roselle require a licensed plumber for island project?
Plumbers provide a State plumber's license in place of the $75 Village fee; bond and insurance still required. Our plumbing connections are made by licensed plumbers.
What does Roselle ask for on electrical work?
Plumbing, electrical and roofing contractors must hold either a state or local license; general contractor and all subs must hold a Village license. New circuits and wiring are done by licensed electricians.
Do I need a permit for island project in Roselle?
It depends on the scope. Roselle's rule in short: Permit required for projects including bathroom and kitchen remodeling, electrical and plumbing work; also water heater, roof, HVAC. We handle the permit when one is needed with Development & Engineering Services (Building & Zoning).
Do you work in my part of Roselle?
Yes. Our crews work across Roselle — ZIP 60172 — and nearby Bloomingdale, Hanover Park, Schaumburg.

Working in Roselle

  • A lot of Roselle kitchens date from the 1970s. We know these layouts well and what is worth keeping.
  • Most Roselle homes are single-family. We protect floors and driveways and leave the site clean every day.
  • We know how Development & Engineering Services (Building & Zoning) handles kitchen permits and pull them for you.

ZIP 60172

Kitchen Island & Peninsula Installation nearby

Planning a kitchen project in Roselle?

Call us — we'll check your ZIP, answer your questions and book an in-home estimate.

Call now (708) 400-7049
Call (708) 400-7049Callback